Archive

Monthly Archives: August 2014

yellowbowdress04ed
yellowbowdress05ed
yellowbowdress06
yellowbowdress03ed

My lack of activity in the blog-o-sphere really has been haunting me, I wont lie!

I recently started a new job. Don’t think it’s right to discuss work on a blog but I will say that I am really excited and I hope I can do a good job :)!
Yesterday I got in lots of sewing time in (housework be dammed) and today I made the final touches to this dress.
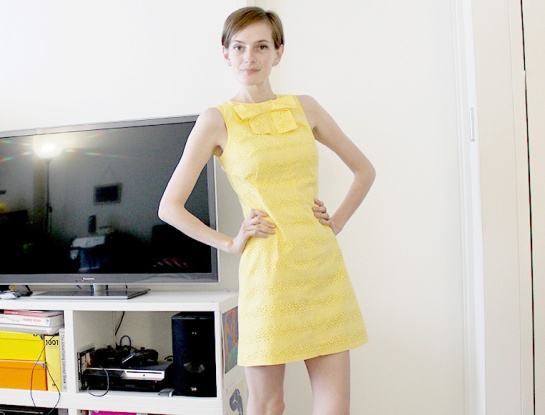
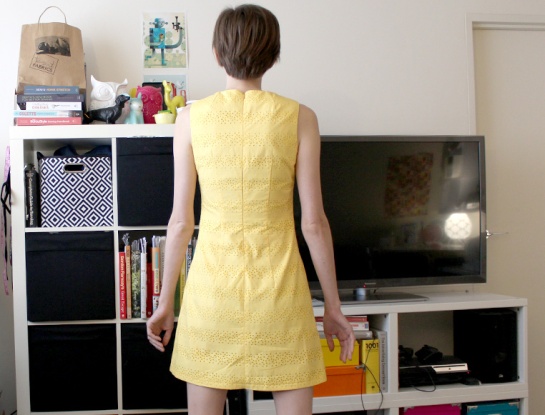
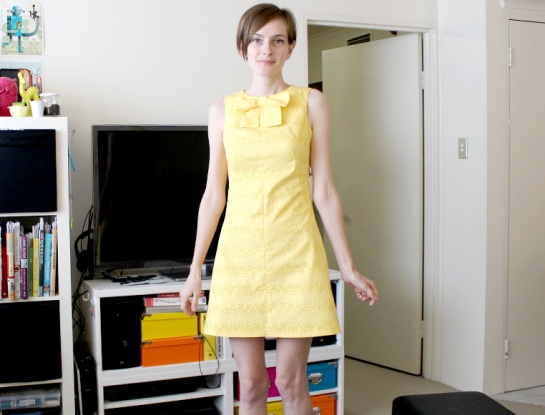
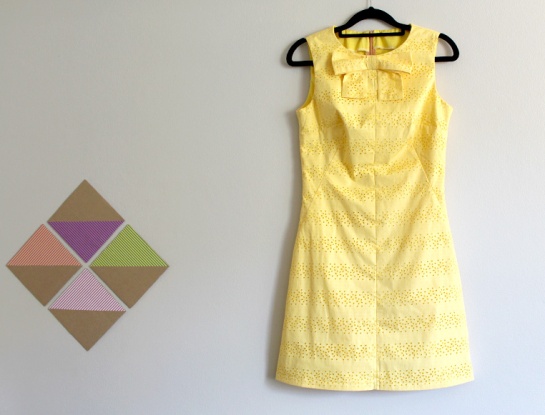
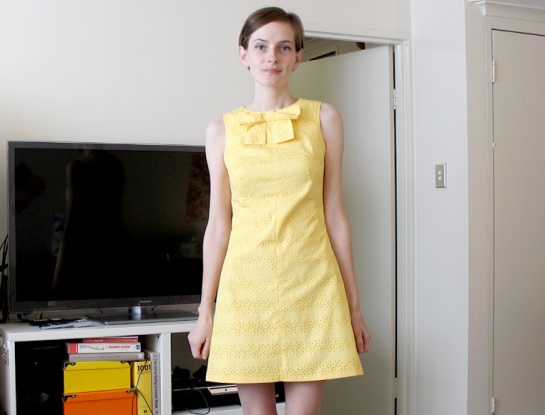
All my recent sewing projects seem to leave me with mixed feelings. I don’t know if that’s because my sewing is getting better (so I have higher standards) or because I pick the wrong things to make. Anyway here’s the new 60s dress (yes it’s another shift dress 😉 )

I didn’t get great pictures of me in the dress. I didn’t feel so fab, I had minimal make up on and then other things that I had to do came up. I guess I could always post better pictures later… (ugh ‘later’ seems to be my motto these days!)

yellowbowdress01
yellowbowdressed
yellowbowdress02ed

Sewing nitty gritty: 

I am not really stoked about the fit of this dress. I think I could have gone up a size or made the side seam allowances smaller.

For anyone else who is considering making a dress up in the same pattern I would probably recommend going up a size if you don’t want a super tight fit. I have heard that vintage patterns are generally a smaller fit and this one has lots of darts and shaping.

Recently I have gone up half a dress size, I’m happy about it, but it does make deciding what size to cut more complicated (I’m sure others can relate). A lot of people move between sizes at different stages, but you want to pick a size that will work over time, so yea perhaps it’s better I go for a slightly looser fit next time!

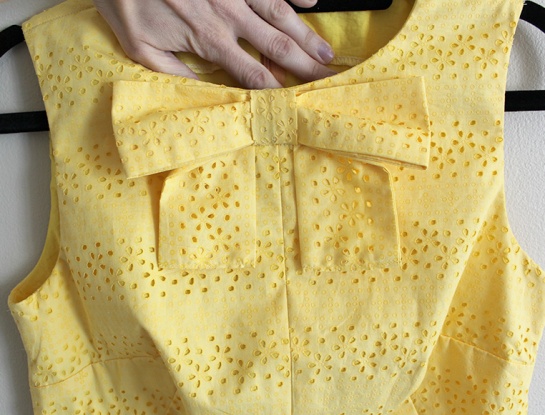
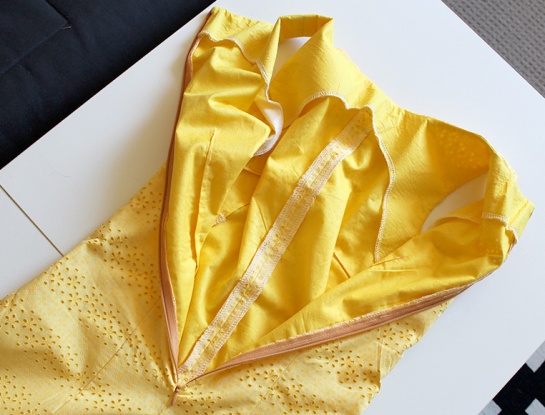
The tricky thing about this faux cotton eyelet fabric is the ‘crease factor’. I am not really against a bit of creasing and I went to the trouble of underling the dress with a lightweight cotton which preserves modesty and makes the dress way more fancy! I really do love the effect underling has on a dress! It makes the dress fabric behave and it makes the dress feel much more substantial.

I really recommend underling. If you want to try it, or just want to learn more Julia Bobbin has a great tutorial/info !

I do wonder if the yellow cotton material was the right choice for this style of dress!  Despite the underling, it does pull and crease slightly (which is to be expected) but perhaps the fabric would have served me better as a top or a fuller pleated skirt. Doing something so fitted in a lightweight cotton may have been a bit silly.

The bow was fun and not difficult to make. I feel like adding bows to all my projects now. Mmmm I’m a big fan of the bow 🙂 (though I don’t enjoy the hand sewing on it).

I had those eyelet stripes going across the dress, which meant that I wanted them to match the fabric on both sides of the zip. I found a neat way of basting the other (yet-to-be-attached) side of the zip (keeping the regular sewing foot on and just moving the needle), before sewing the other side of the zip on….Guess that it’s too hard to explain without a tutorial.

That’s probably enough about the dress. Hope you like it!

I made a muslin using a different burda shift dress and it’s got me pretty excited excited about! It’s a looser fit shift dress, totally basic design and it’s bra-friendly. so I’m sure I will make a lot of dresses soon in crazy bold patterns!

-Kath
feltpop02ed
feltpop03
feltpop01

I have been ‘out-of-action’ sewing-wise recently (several cut out projects remain stitch-less so far), which explains my blog negelect but what really upsets me is all these amazing looking blog posts I haven’t read yet! I have a lot of sewing blogs to catch up on and I can’t wait for the inspiration hit.

This weekend involved shopping, Korean BBQ and hanging out with my boyfriend/all-time favorite person, so even without being at the machine I was happy. Recently I have also become more interested in cooking and baking. I’m starting to change my diet and eat tons of healthy food… My cheeks are filling out, my skins clearing up and I feel much better! 😀

Last week I drove to Chatswood. This was a huge deal for me because driving in the city terrifies me (I usually walk or take public transport). The reward for making it to Chatswood alive was a trip to Daiso and a lovely late lunch at Mamak. Daiso was epic this time! They had a huge selection of polyester felt. Happily I bought some felt squares in different colours as I knew exactly what I wanted to do them…

My plans for said felt was a jumper featuring one of my favorite things: A chilli! How fun would it be to have a jumper with one of my favorite foods?!

But before I attempted a more detailed design I wanted to test out how this felt would work/look sewn to a jumper, so this ice cream/Popsicle design was my test run. I’m wearing it right now! I love how bright and cheerful and non-winter it is! You can tell I prefer warm weather!

Despite owning/sewing a lot of dresses one of my favorite things to wear are graphic printed tees but in the winter It’s too cold to wear/showcase a printed tee so this is a good alternative. I just love the dorky yet cute vibe of embellished sweaters (provided they aren’t too ’80s Kath day knight’  Yikes!! No sequins or shoulder pads for me thanks!) Anyway the stitching is pretty ‘blah’ but you know what? you get the idea/vibe I was going for so I still like it!

Anyway here’s what I did….

feltpopdiy01

I just picked two colours of the polyester felt that I liked and tried to think of a design that would be cute, but was only made out of simple shapes…

feltpopdiy02

Then I drew some rough shapes. I ended up ‘refining’ it a bit with the scissors (making the pole narrower etc). It was rather stupid to use a dark blue marker to make these shapes, because it does show through slightly on the other side.

feltpopdiy03

The felt kind of sticks to the jumper temporarily so you can play with the positioning and decide what looks best, while you are wearing it. Next time I would have probably used an iron on adhesive called visoflex to adhere the felt to the jumper (before sewing around the design) but I did not want to make the trek to a fabric store just to get it so I just held it in place with pins while I sewed it.

feltpopdiy04

Then I googled “how to blanket stitch” and used polester sewing thread (doubled over) to stitch around the design. My hand sewing is terrible but ‘eh’ good enough…it’s just a bit of fun!

No news yet on how well this felt design holds up in the wash. But when I find out I will update this blog post with my findings!

Anyway…Yay! Summery fun in winter. Also speaking of icy poles or “pops” a lovely site called ‘Henry happened’ has some lovely looking DIY popsicle recipies. I guess for now I’ll stick to veggies and comfort food!